
How to create a VPN with pfSense
This guide will work only using Horizon.
- Create two networks: one for the WAN, one for the internal LAN
- Launch an instance with the pfSense image (image name:
pfSense 2.3.2- ID:010ae2b2-a948-46b8-a702-c9c4a1346afcs) with the two networks attached. We recommend at least anx2flavor for this instance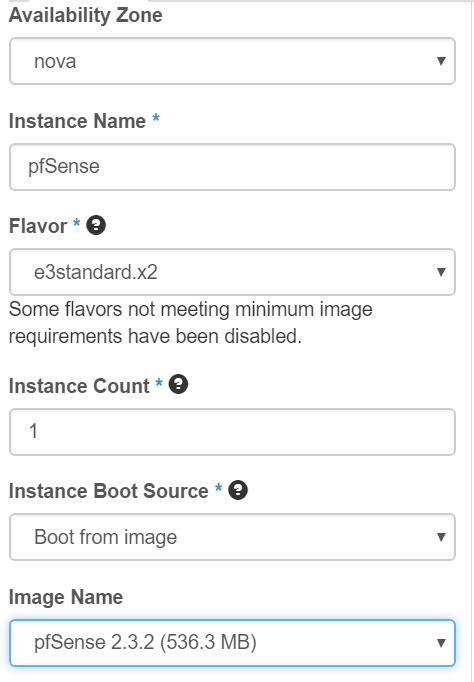
Please note the order of the added nics. In this guide we’ll use
pfSense_WANnetwork in NIC1 andpfSense_LANnetwork in NIC2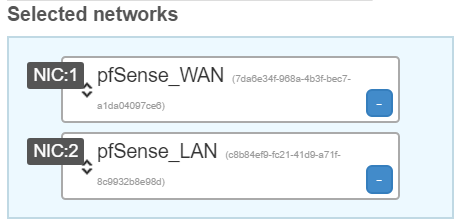
- Reach the virtual terminal of the instance and follow the setup wizard on the terminal in order to setup pfSense. Remember the nic order to define which is WAN and which is LAN
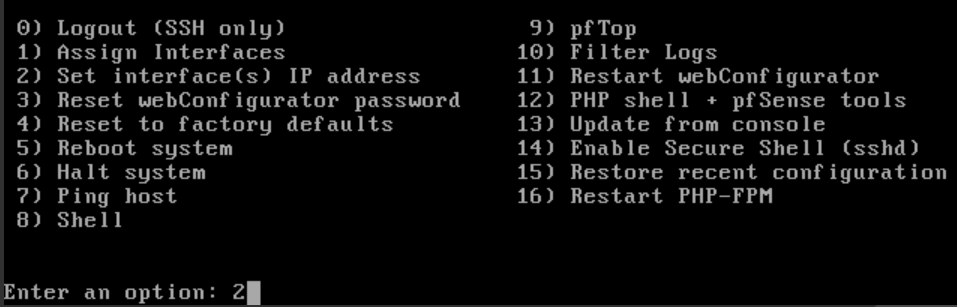
- Once the multiselection menu appears, select the option “2”
- When this message appear “Should VLANs be set up now
[y|n]?” You must typeN -
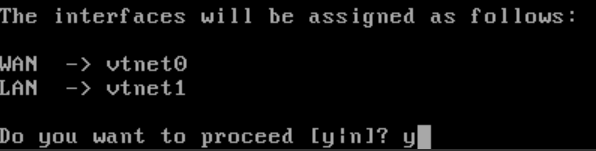
When the system will prompt “Enter the WAN interface name or ‘a’ for auto-detection” you need to remember the order of added nics (2nd point), in our case WAN is the first selected so we will type
vtnet0 After that we will insert
 vtnet1for the LAN interface Then leave an empty space when it ask “Enter the Optional 1 interface name or ‘a’ for auto-detection”
 Type “Y” when it ask if “you want to preceed”
-
Now you need to setup the interface(s) IP address, type “2”
-
You need to setup only the LAN address, you will see the available interfaces and you need to insert the number of the LAN interface (in our test, 2)

- Setup the same address and subnet which is assigned by Neutron to the machine. You can see it from the overview of the machine in the “Instance” section of Horizon
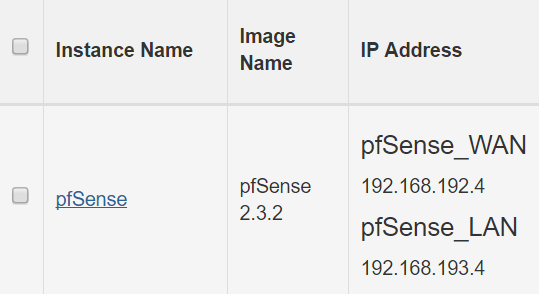 in our test the IP assigned by Neutron is
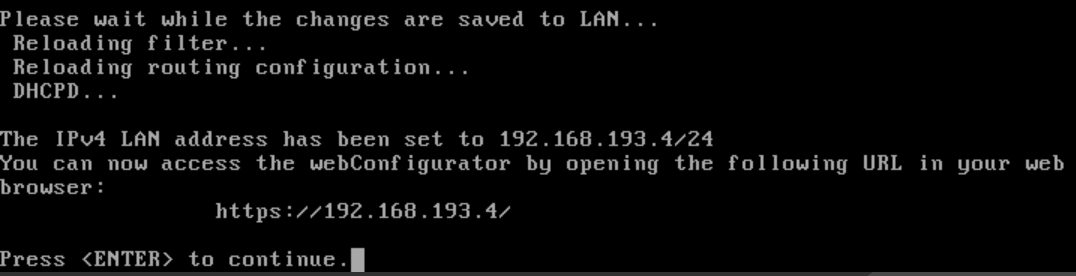
 192.168.193.4, as you can see from the image below then you need to insert the subnet, in our case is /24 so we’ll insert
 24 Just leave the empty field in the other requests
 -
You shouldn’t enable the DHCP server on LAN because when you need to create any server on the
pfSense_LANyou will select the Network LANpfSense_LANand the server will have an IP of the same LAN subnet You don’t need to revert the HTTP as well, type
 N At this point just press Enter to finish the configuration
- In order to finish the setup, it’s necessary to enable everything in the pfSense firewall in order to access the pfSense web UI; in order to do so:
In the multisection menu, select “12”. Type:
playback enableallowallwan
playback disablereferercheck
You can now associate a floating IP to the instance, and by navigating to
https://<pfsense-ip-address>you should see the pfSense login interface. Default credentials are:- username:
admin - password:
pfsenseAfter the login, the first setup wizard should appear. When you terminate the procedure, go to the firewall setting to setup your rules (Firewall->Rules)WARNING: open the 500 and the 4500 port, UDP protocol for IPSec to work.
- username:
- Once you are done with the IPSec configuration, insert the allow rules in the IPSec firewall rules (Firewall->Rules->IPSec)
You have to disable antispoofing in order to avoid your data being blocked by Neutron ports; you need to setup the “neutron” command and the environment for using it and issue:
neutron port-list | grep "<YOUR-PRIVATE-IP-ON-THE-LAN-NETWORK>"
neutron port-update <NEUTRON-ID-FROM-PREVIOUS-STEP> --allowed-address-pairs type=dict list=true ip_address=0.0.0.0/1 ip_address=128.0.0.0/1