
How to manage your volumes
SERVICE OVERVIEW
Every instance flavor comes with variable amount of local storage: but instances in the cloud are to be considered volatile, as well as data they store internally. This type of onboard storage is called ephemeral storage. Block storage volumes, instead, are persistent drives, and they are vital to provide reliability and durability to user data, either on filesystems or databases.
Enter Cloud Suite allows to create, resize, backup, clone and move volumes across different instances, thus providing a great level of flexibility when it comes to create test&dev environments or securing data. Volumes rely upon the block storage service of Openstack (Cinder) and the Ceph filesystem, and they are local to the region where they are created. Redundancy is provided by replicating data twice and synchronously on different hardware nodes, within the same datacenter.
Multiple volumes may be attached to a single instance at a time, but a single volume can only be attached to a single instance at once. Advanced functionalities to back-up volumes to object storage are available via CLI (command line interface) or API, and enable users to replicate sensitive data across different regions and datacenters.
-
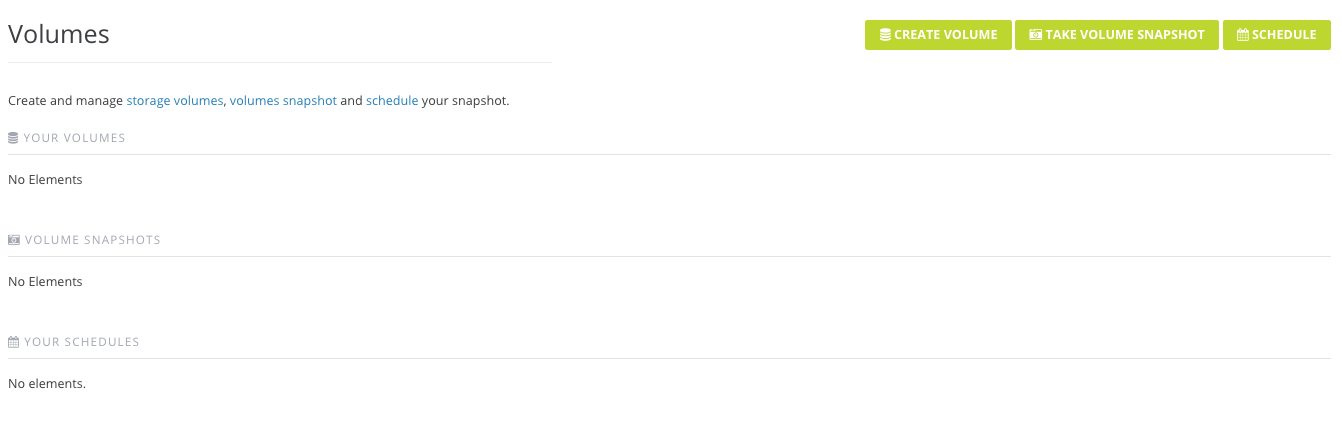
Log into the Enter Cloud Suite Dashboard.
-
Click on Computing > Volumes on the left menu.
CREATE A VOLUME
-
Click on the Create Volume button on top right.
-
Define a name and a size for your new volume.
- Choose the volume type:
- Archive - for archival purposes, slow performance (50 IOPS)
- Standard - for typical filesystem usage (100 IOPS, 7.2kRPM SATA-like)
- Plus - for average database usage (500 IOPS, 10kRPM SAS-like)
- Top - for demanding database usage (1000 IOPS, SSD-like)
- Secure - for hardware-based encrypted drives (50 IOPS, OPAL drives)
-
Choose the region where you want to create your new volume. This choice will affect the list of instances you will be asked to attach the volume to.
-
Choose the instance to attach your new volume. If you are logged into the chosen instance, you will see the drive popping up instantly in the storage manager or kernel logs.
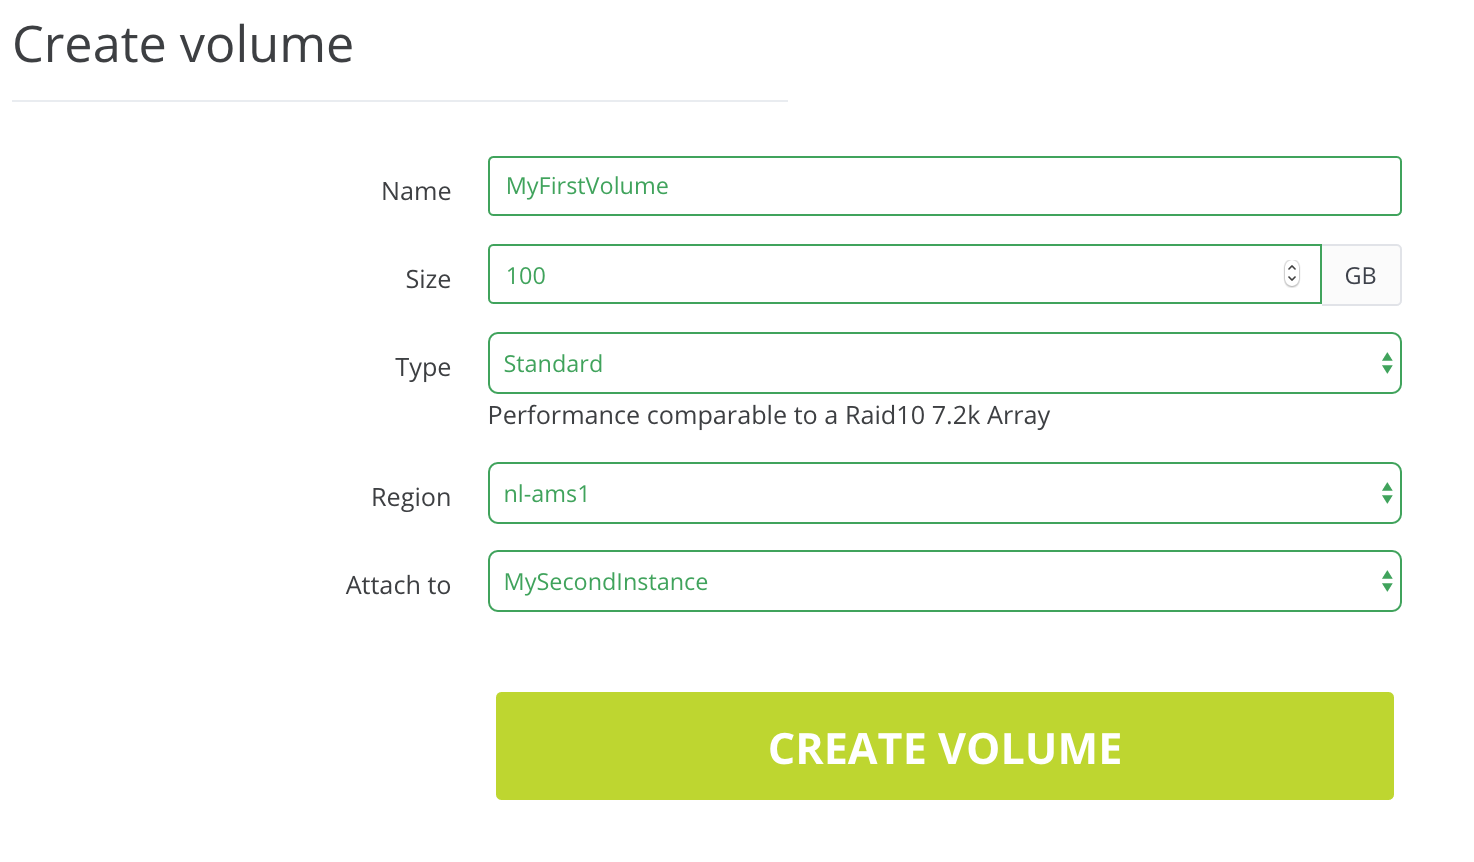
- Click on Create volume button. Note: you’re just a few steps away from using your fresh new volume. Remember that attaching the volume is just like plugging a USB stick into your PC. Now you need to partition, format and mount it in order to use it. If you don’t know how, read the following guides: • <link to “How to perform first access to your instance”> • <link to “How to mount a new volume on your instance”>
SCHEDULE VOLUME SNAPSHOTS
In order to support greater data integrity and compliance, volume backups should be performed regularly. A scheduling tool has been developed to help Enter Cloud Suite users to plan backups and avoid manual, error prone activities.
-
Click on Computing > Volumes on the left menu
-
Click on Schedule backup button on top right
-
Select the volume to be backed-up
-
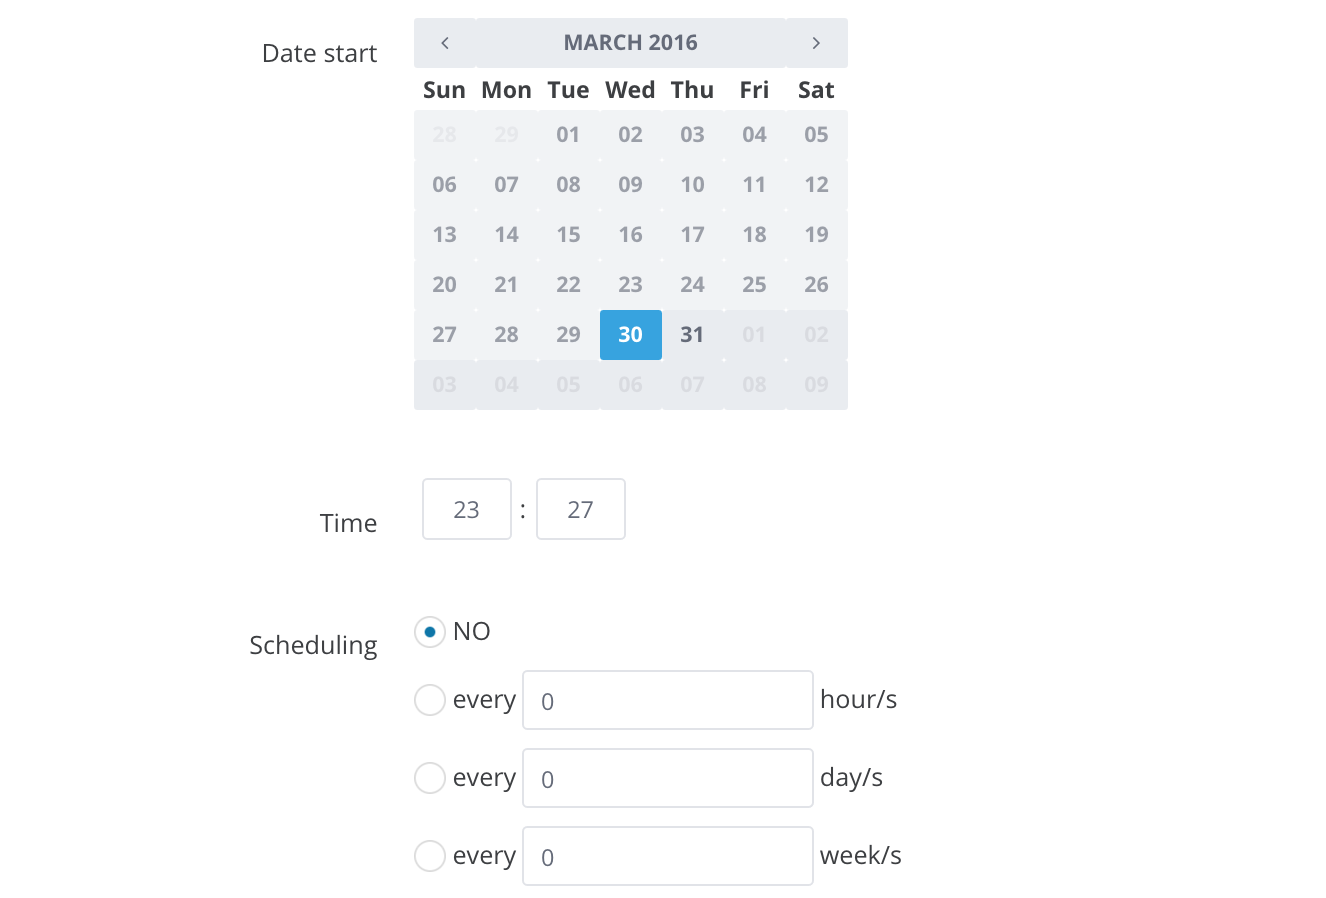
Select the starting date for the scheduled plan
-
Input the time of day when the backup has to be performed
-
Define the recurrence for the backup
-
Acknowledge that the snapshot task will disconnect temporarily your volume from your instance, to make sure there aren’t write operations in progress. This is due to preserve data integrity.
RESTORE A VOLUME FROM A SNAPSHOT
-
Click on Computing > Volumes on the left menu
-
Go to the Volume Snapshot tab and find the snapshot you want to restore

-
Click on the grey icon next to the selected snapshot, and click on Create Volume

-
Insert a name for your restored volume
-
Define a size for your restored volume. Note: your restored volume must be equal or greater in size than the original snapshotted volume to avoid restore failure.
-
Select a volume type (see above for performance classification)
-
Select the region where you want to pick your snapshot
-
Choose an instance to attach the volume
-
Choose a snapshot to restore among the ones available in the selected region

DELETE A VOLUME
-
Click on Computing > Volumes on the left menu
-
Go to the Your Volume tab and find the volume you want to delete
-
Click on the red bin icon next to the selected volume
-
Confirm the deletion of selected volume
DELETE A SNAPSHOT
-
Click on Computing > Volumes on the left menu
-
Go to the Volume Snapshot tab and find the snapshot you want to delete
-
Click on the red bin icon next to the selected snapshot
-
Confirm the deletion of selected snapshot