Configure your firewall rules
-
Click on Computing > Security on the left menu.
-
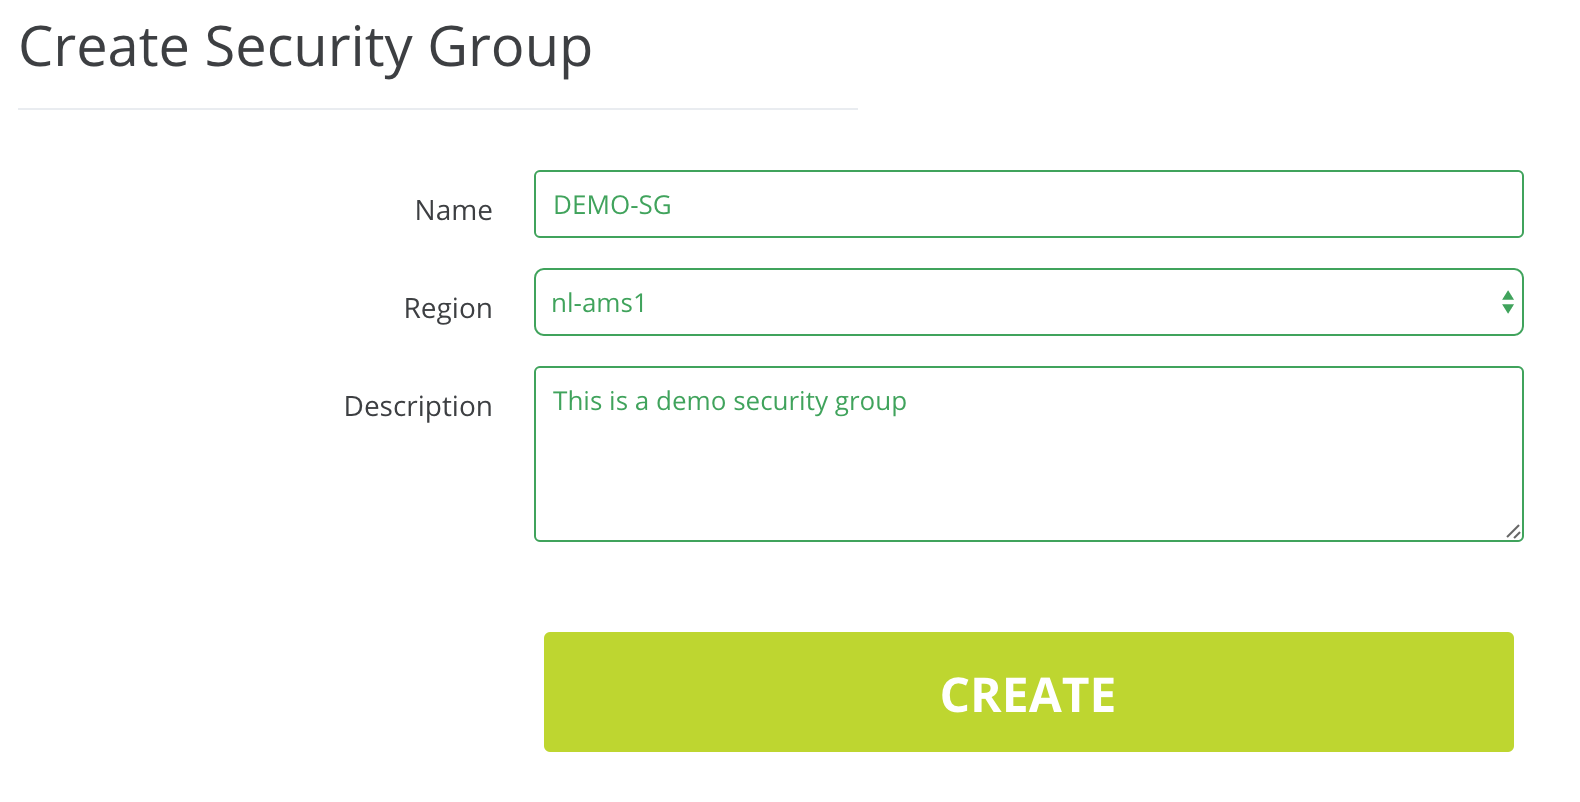
Click on Create Security Group on the top right of the screen.

-
Define a name and a description for your security group, then choose the region where you need to use it.
-
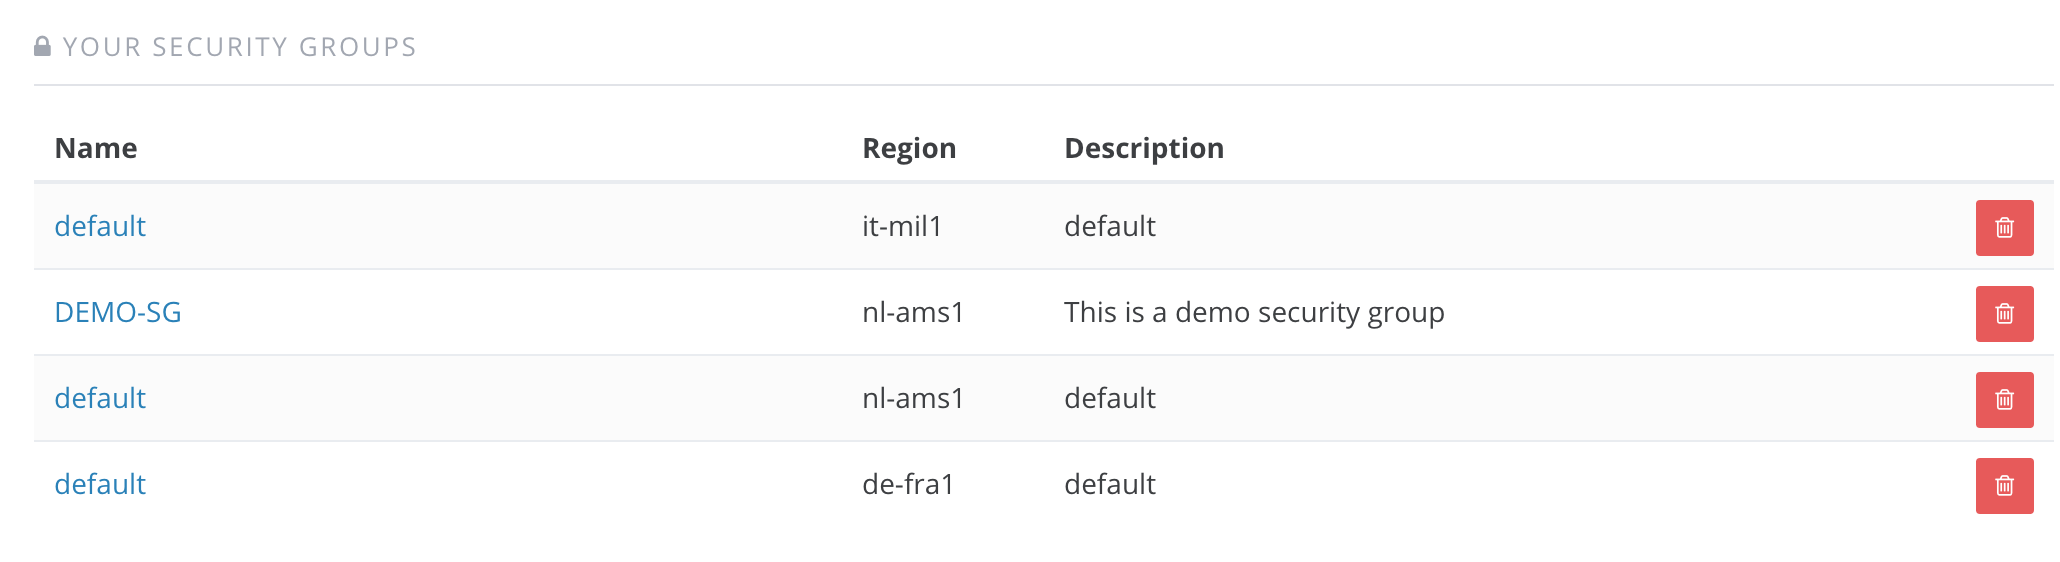
Your security group will now be created and you will be redirected to the main Security screen. In order to modify the security group’s rules, click on its name.
-
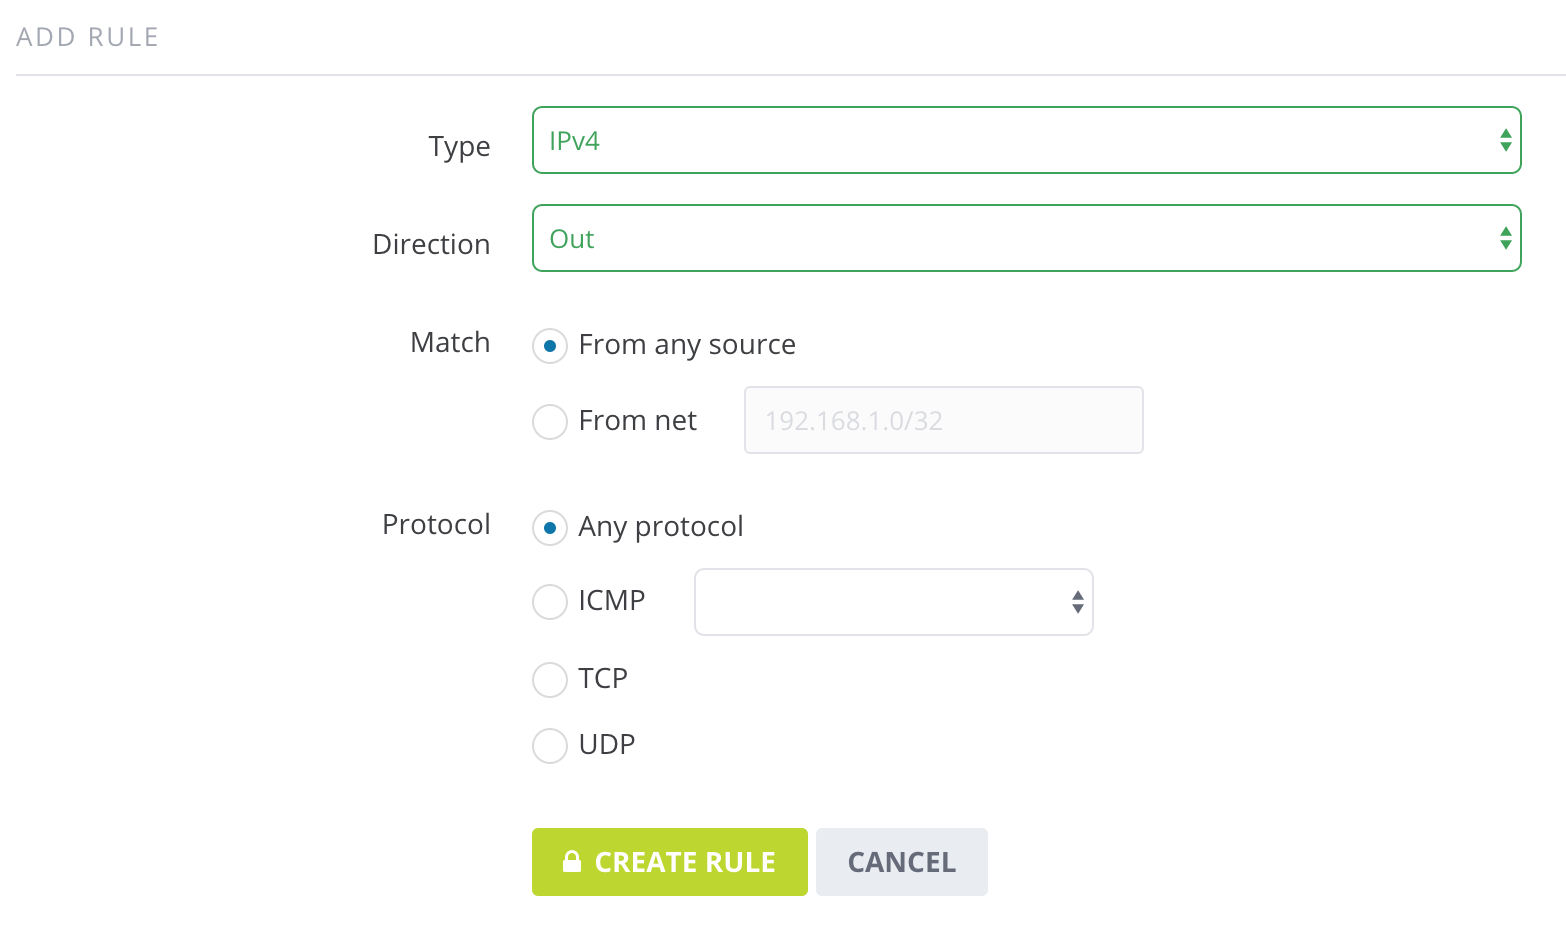
By default, there will be no rules. First of all, create a rule to allow all outgoing traffic from your instances. Fill up the required fields as per screenshot, and click on Create Rule.
-
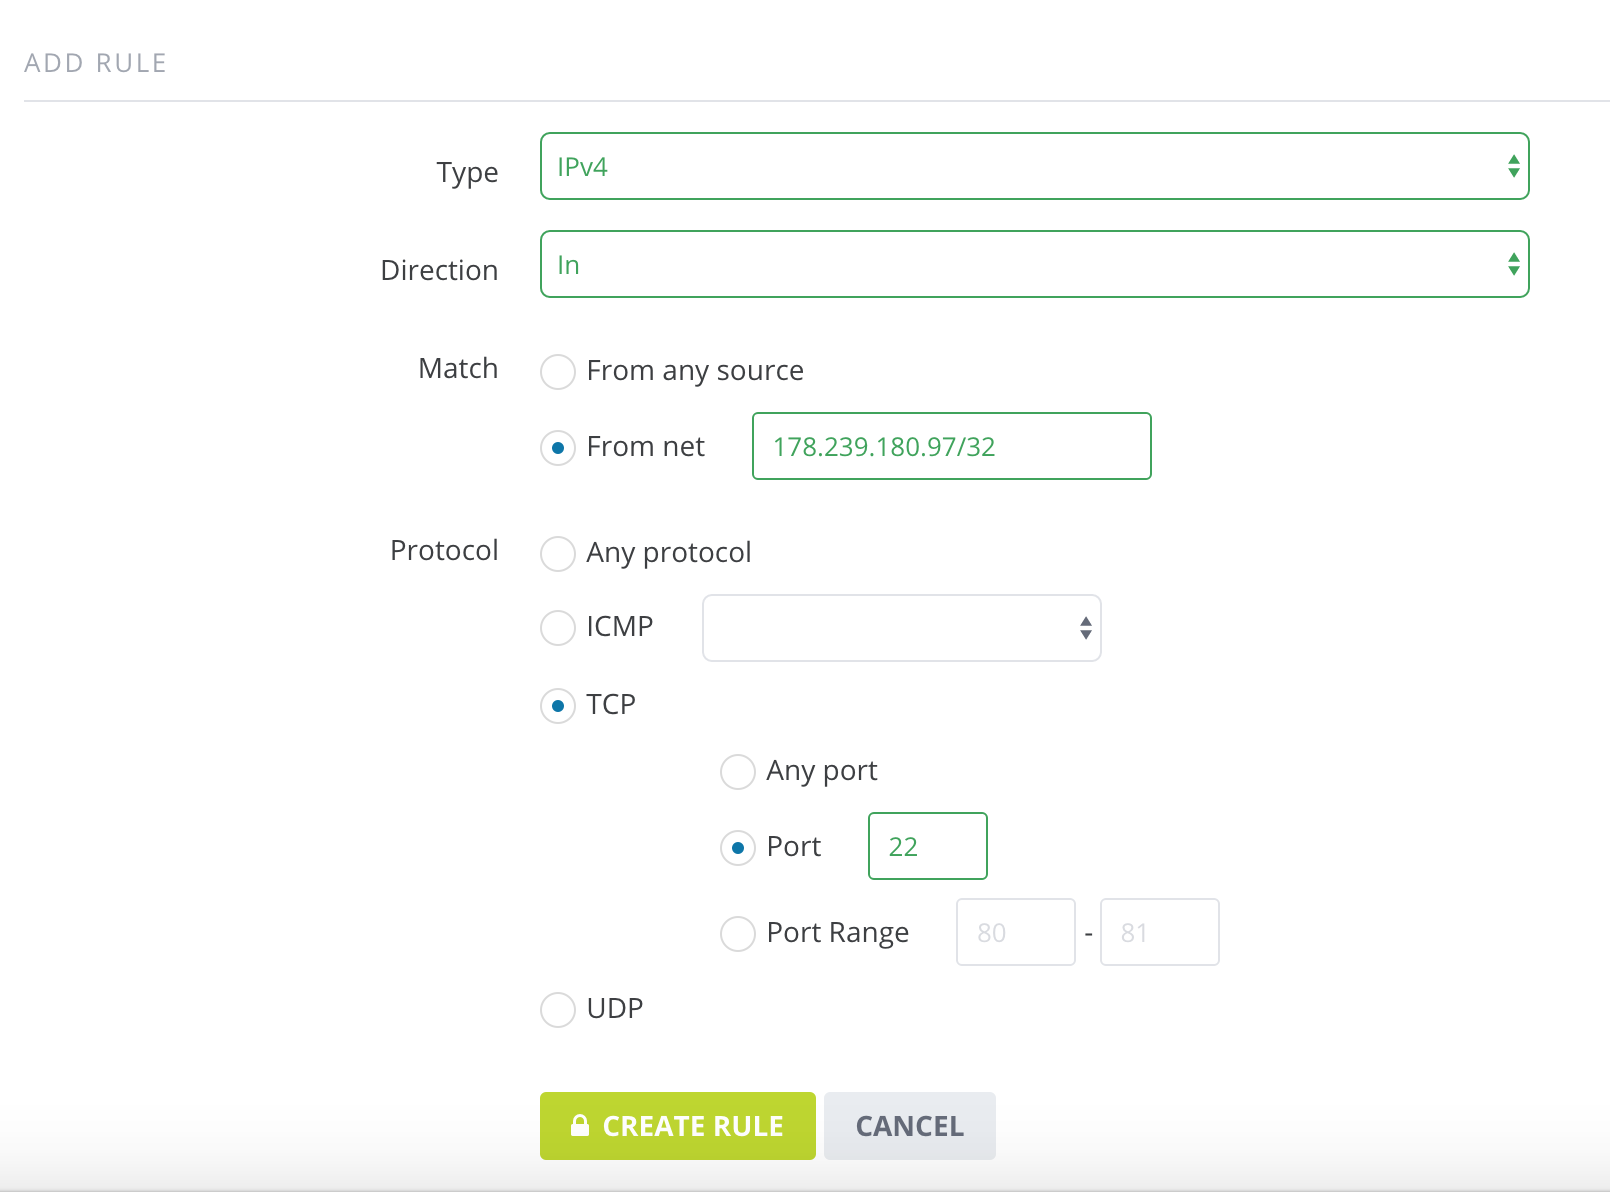
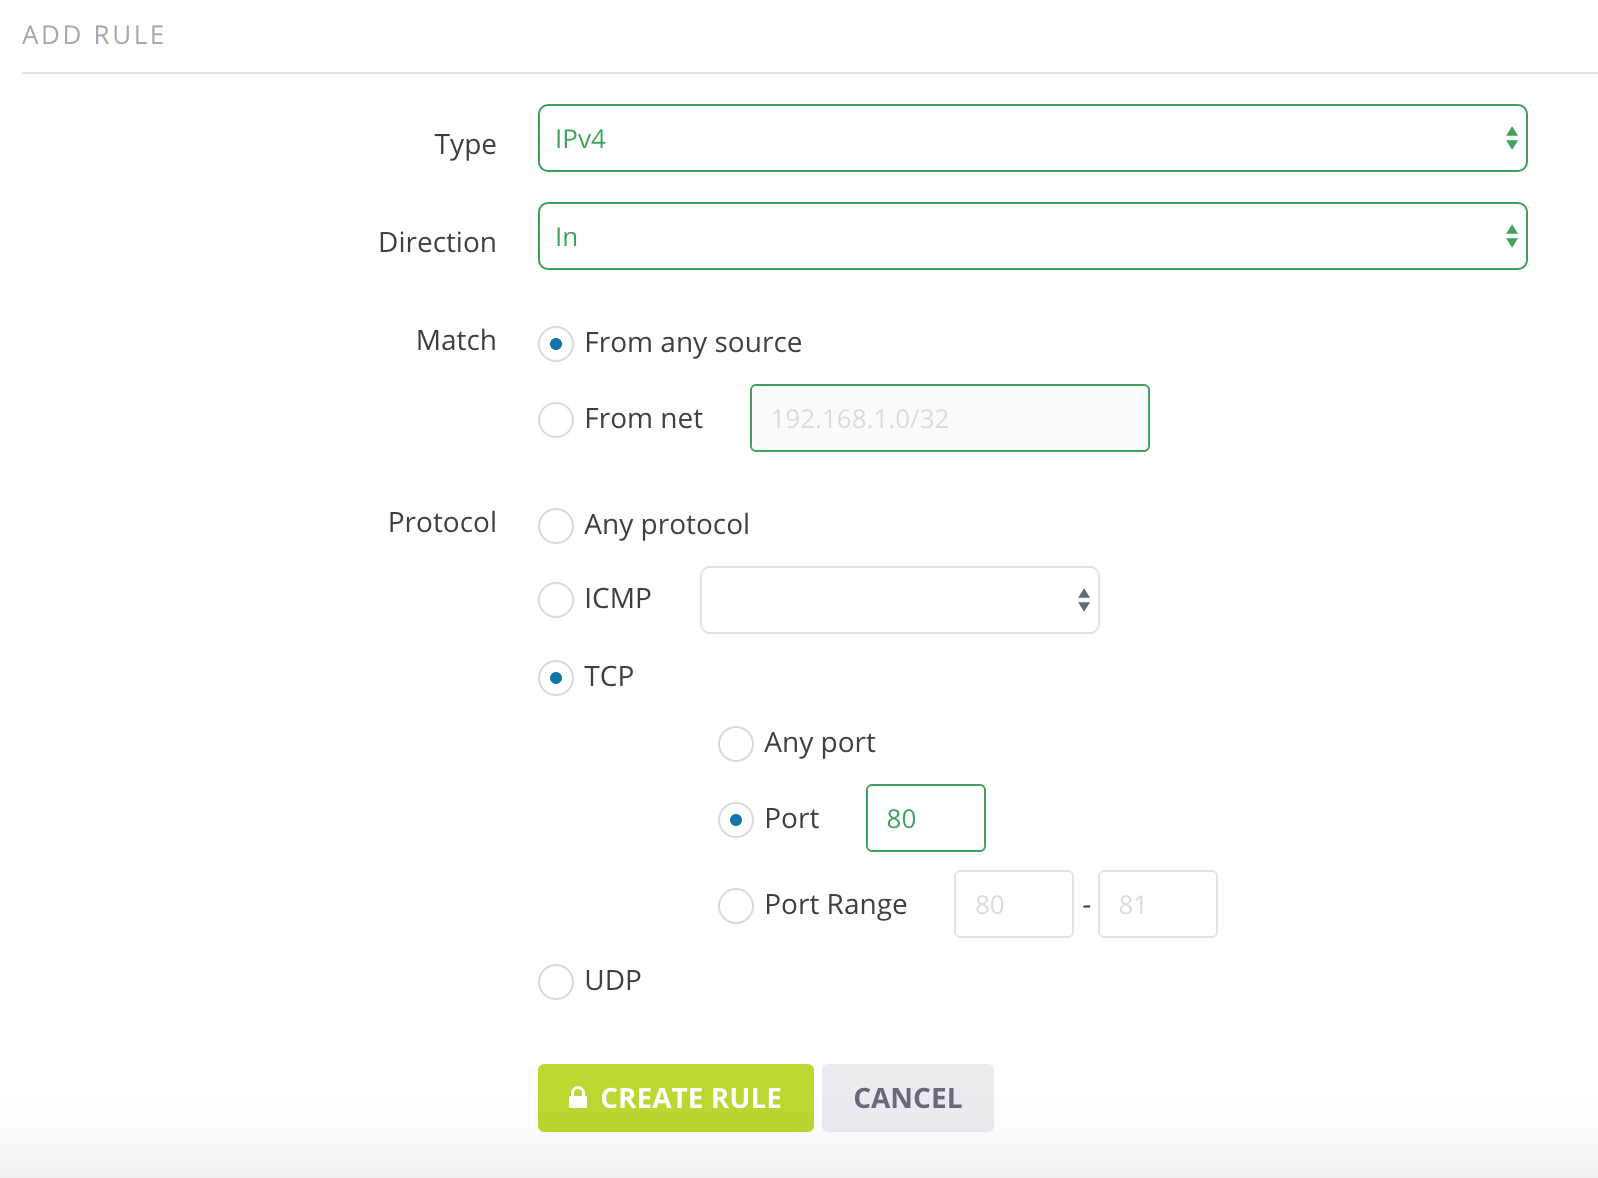
You can then create specific rules for incoming traffic. In a standard “web” use case, you would allow administrative traffic from some service IPs only, and http traffic from any source.
-
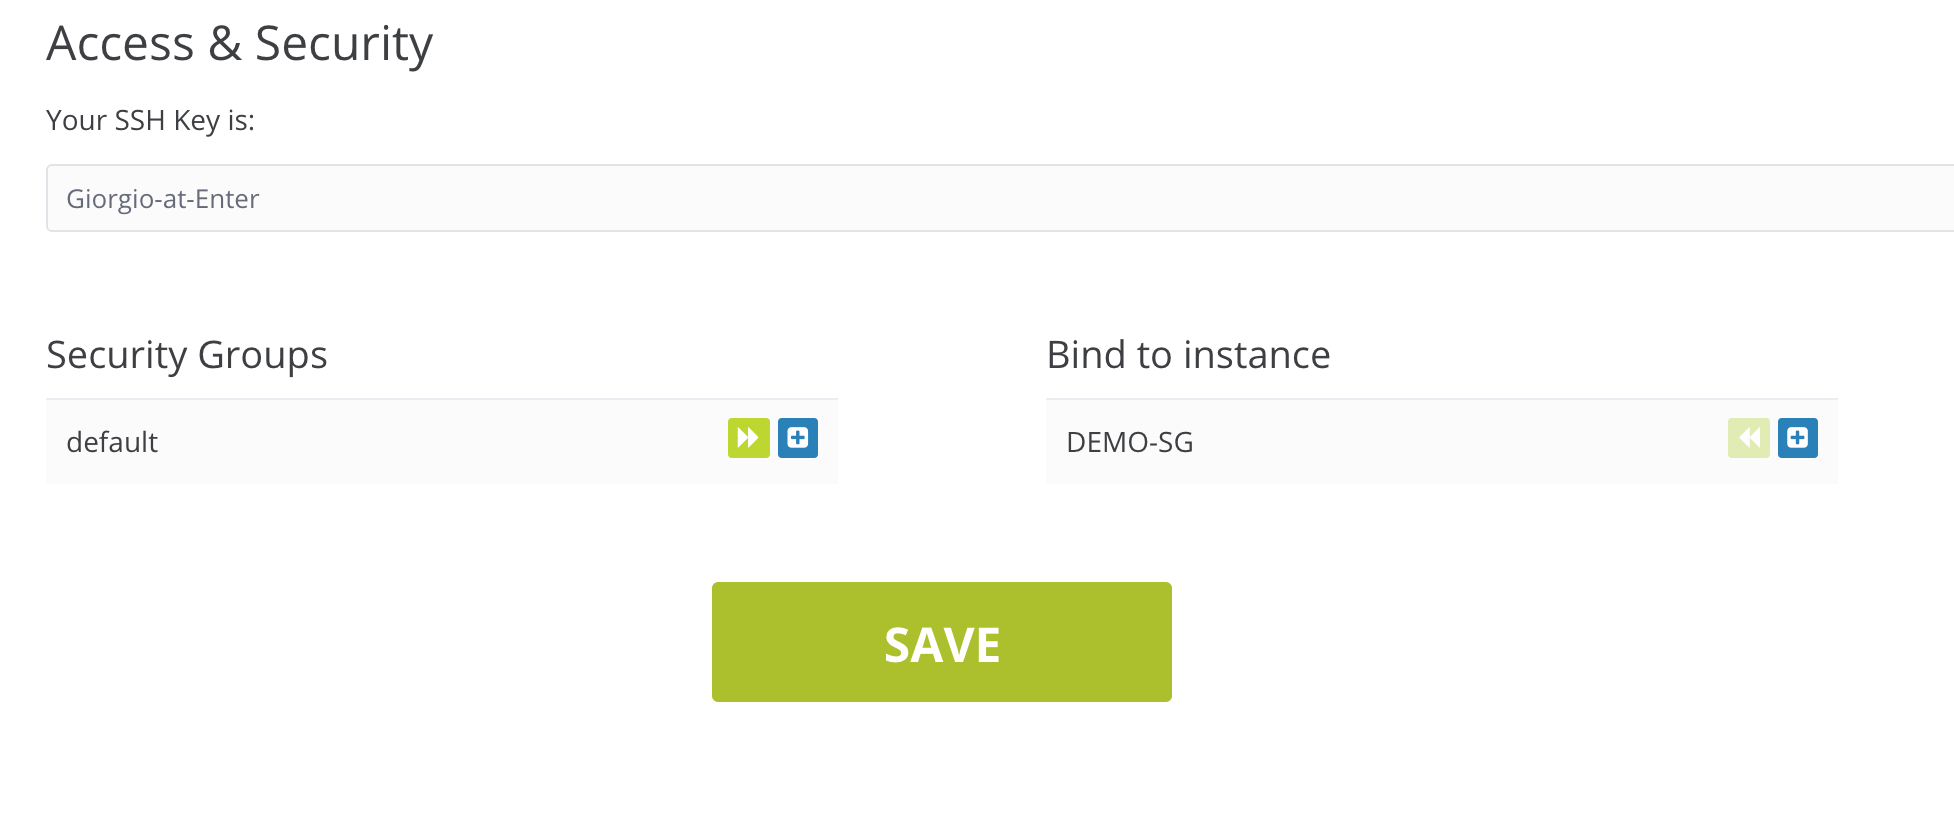
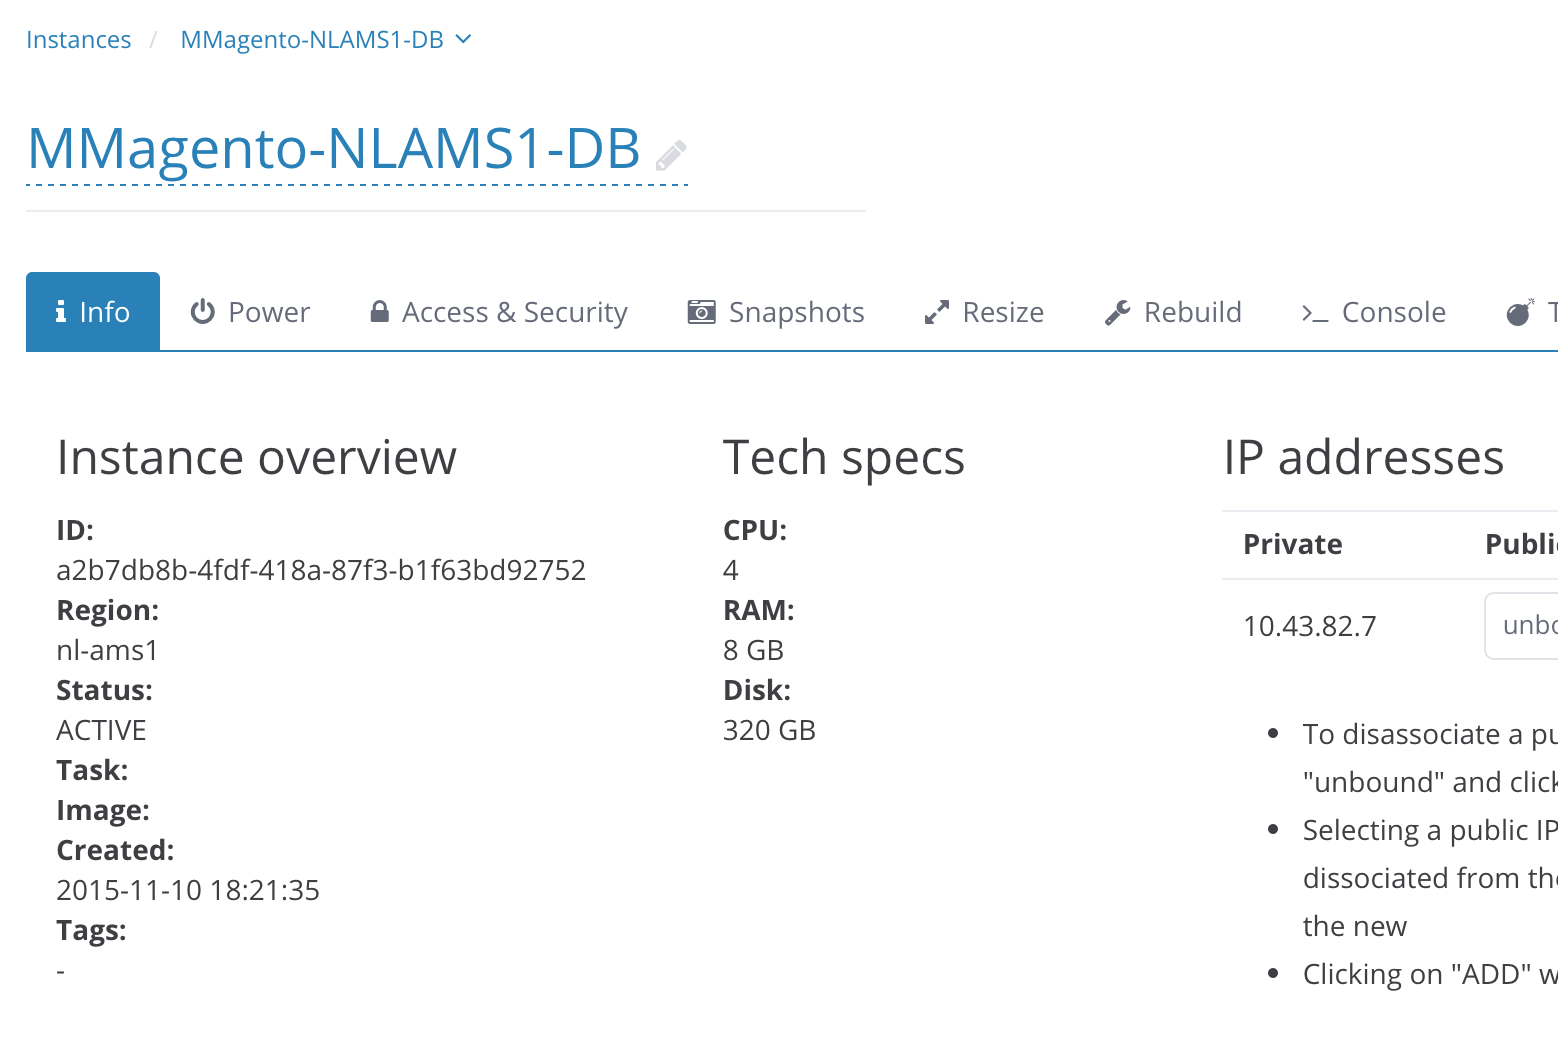
As last step, you need to associate the new security group to the instances you want to protect with it. Go back to the instances menu, and click on the instance you need:
-
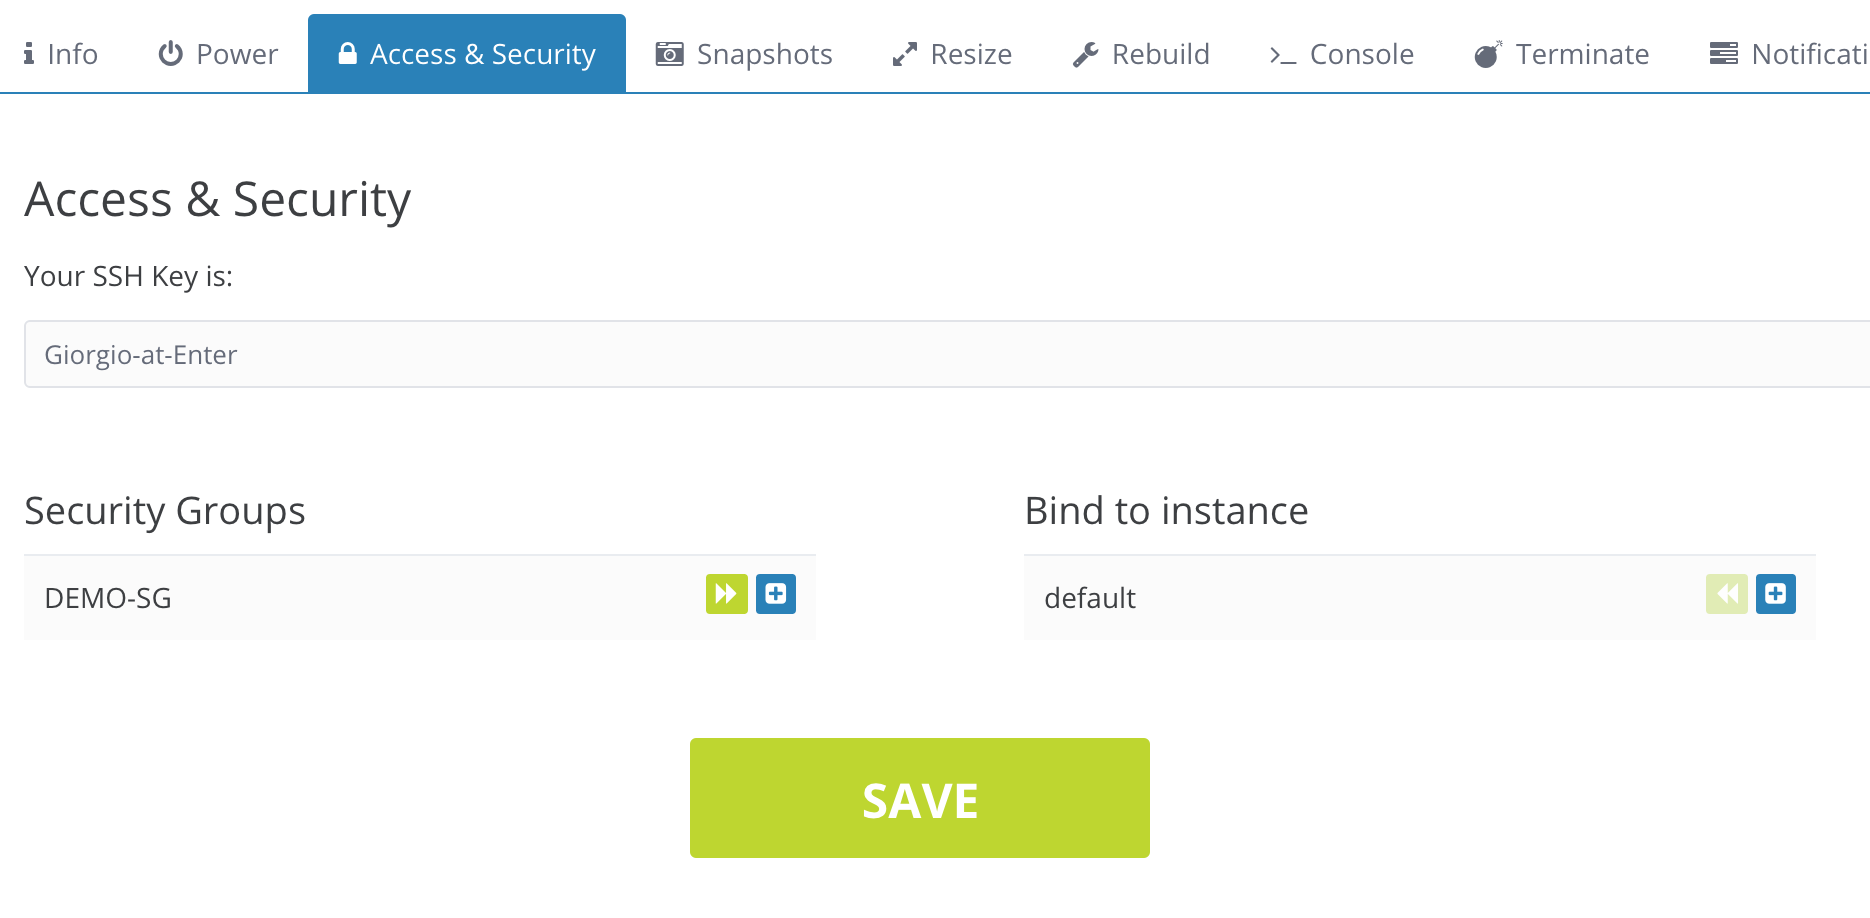
Then, open the Access & Security tab. You should now see the “default” security group associated to the instance, and the one you created as available:
-
Remove the default one, and add the new security group, then click Save. This should be the final setting.