
How to manage your containers
-
Log into the Enter Cloud Suite Dashboard.
-
Click on Object storage > Containers on the left menu.
CREATE A CONTAINER
-
Click on Create a Container on top right.
-
Choose the name for your new container
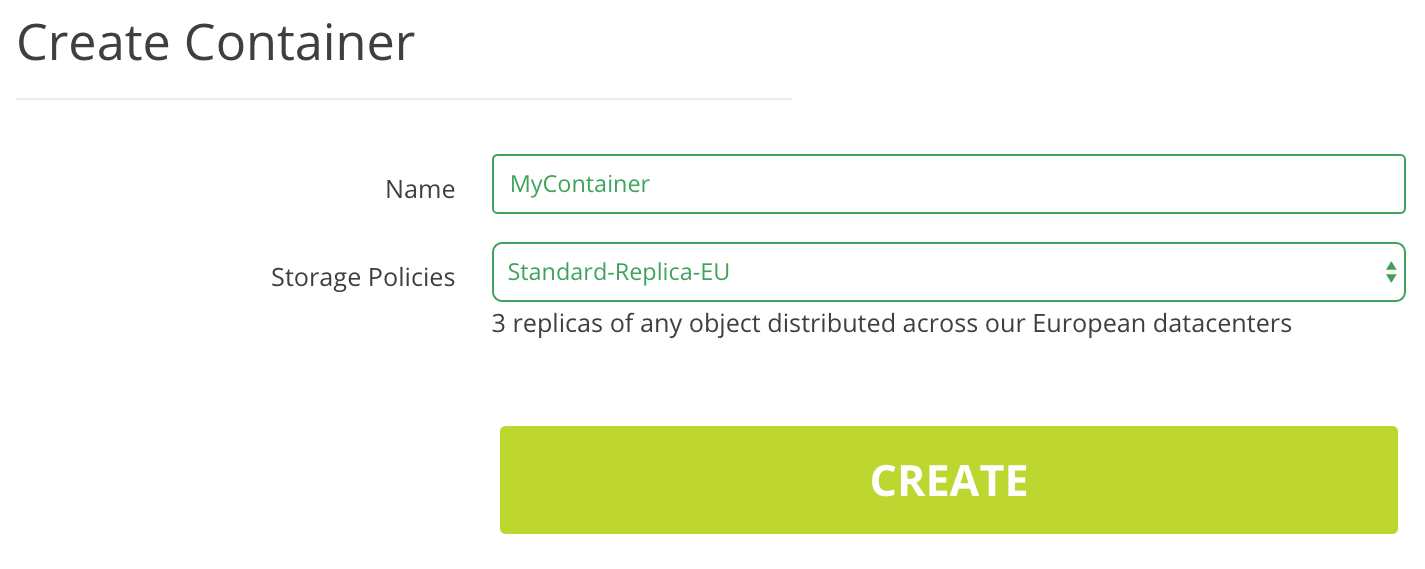
- Select the storage policy you want to apply to the new container:
- Standard Replica EU - 3 copies of data, one per region
- High Replica EU - 5 copies of data, one per region plus two additional copies randomly dispersed
- Standard Replica ITA - 3 copies of data, all in Italy, each on different storage nodes and drives
- Click on Create Container
BROWSE AND MANAGE CONTAINERS
-
Click on Object Storage > Containers on the left menu
-
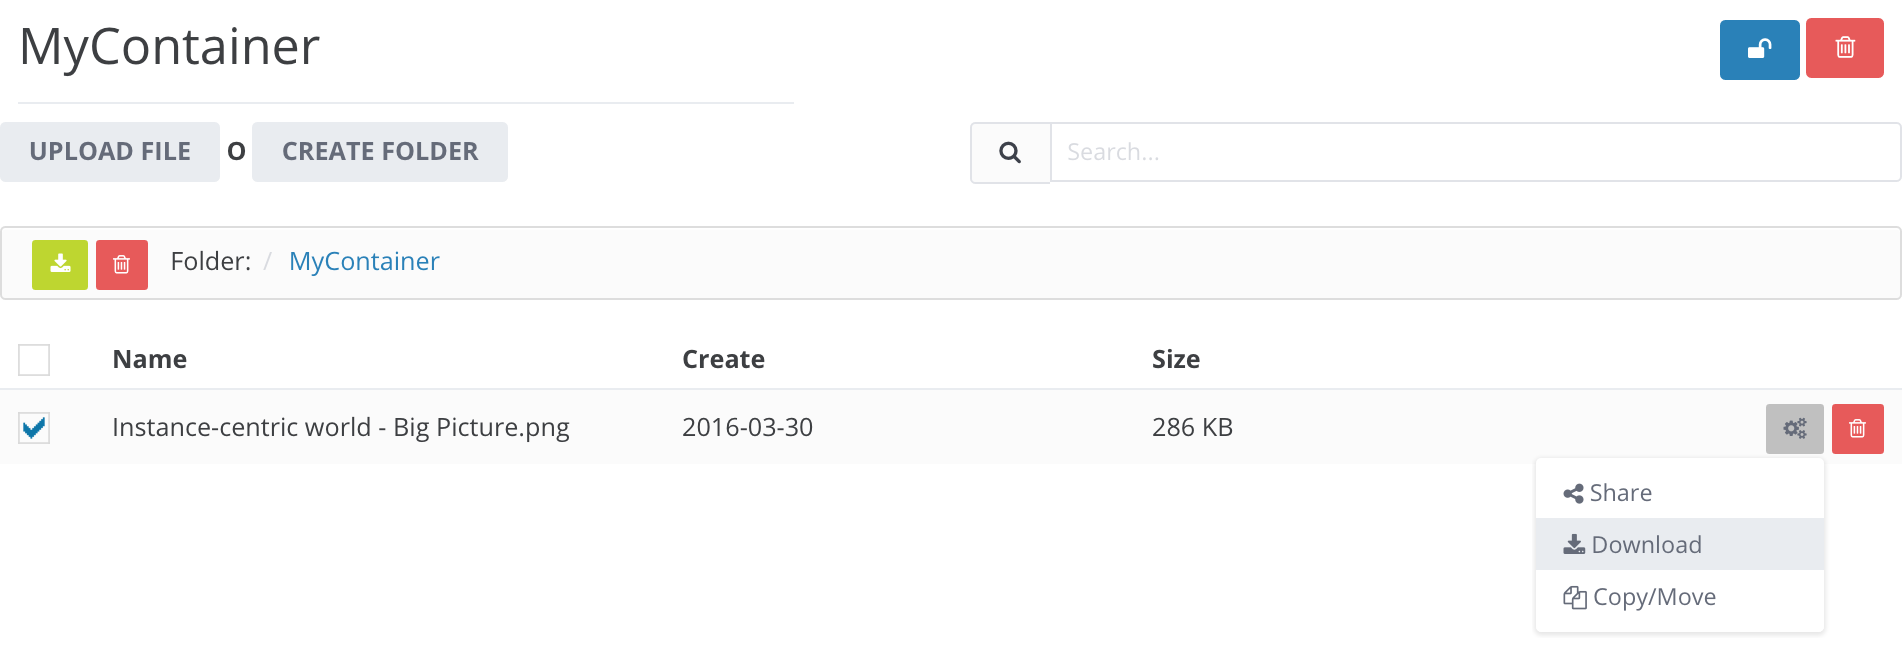
Click on the name of your container to get a list of its content
-
To upload a file, click on Upload File, on top left
-
To download a file, click on the grey icon next to the file name and select Download
-
To copy or cut and paste a file, click on the grey icon next to the file name and select Copy/Move. Change the name or select a different sub-folder in order to copy or move the file.
-
To create a folder, click on Create Folder
DELETE A CONTAINER
-
Click on Object Storage > Containers on the left menu
-
Click on the name of your container to get a list of its content
-
Click on the red bin icon on the right