
How to manage your health checks and smart DNS records
-
Click on DNS & Domains on the left menu
-
Then click on Add Health Check button:

-
Choose a name, a destination IP and a protocol. We’ll use ping, but you can also do TCP checks that will verify if something is listening on a given port, or HTTP, that will check if the destination server is answering with 2xx codes.

-
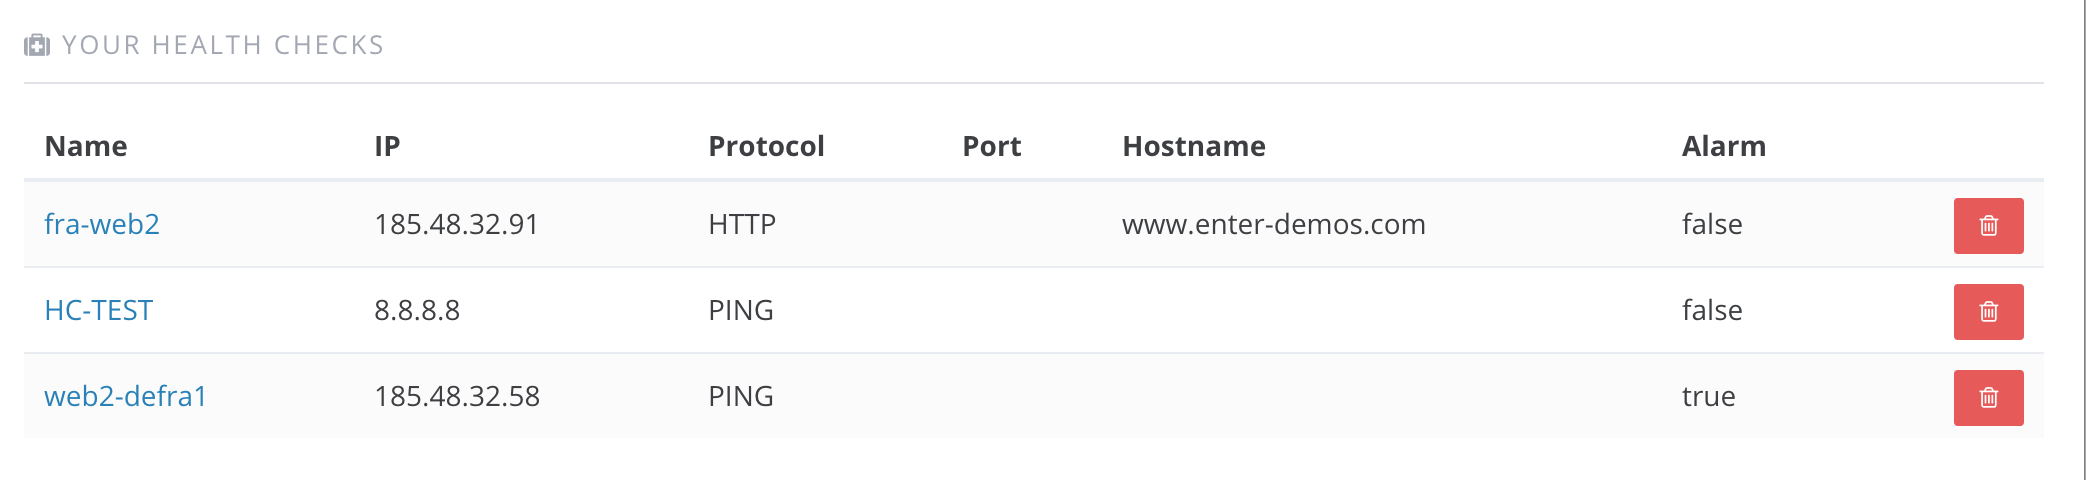
You will now be redirected to the summary page. As you can see, the health check has been created and it’s working.
-
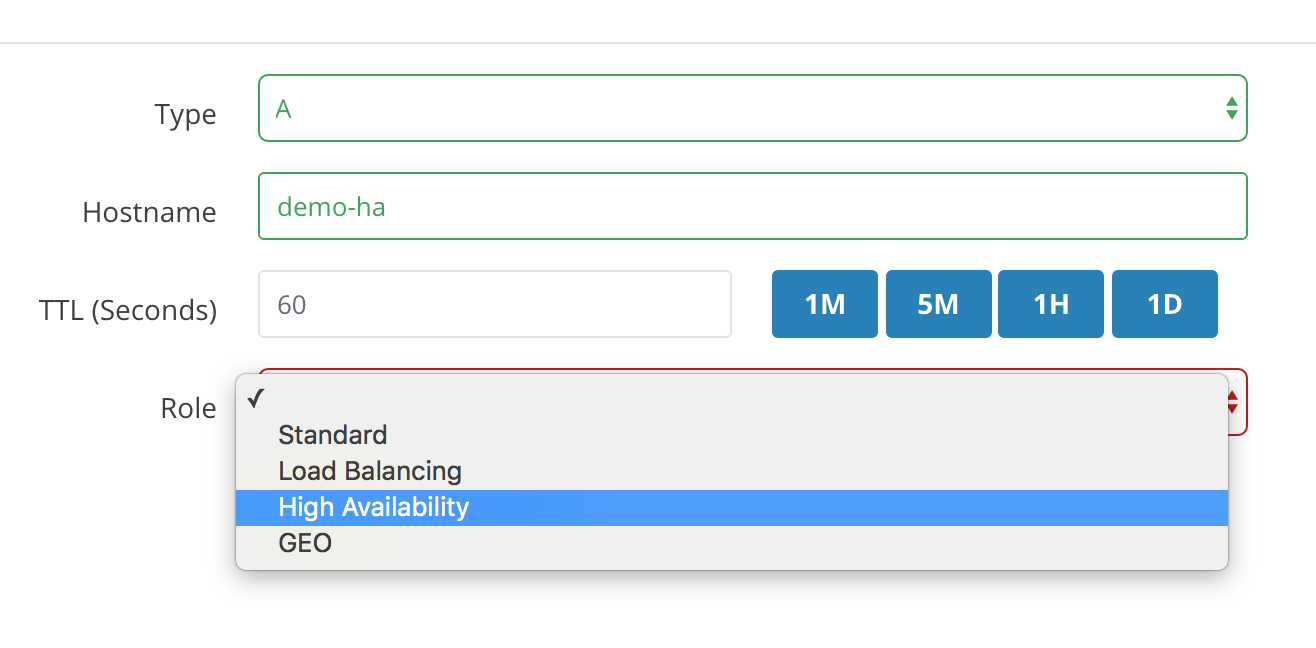
Let’s create our first High Availability Record. Open you domain’s details page and click on Add Record. Choose type, hostname and TTL for your record and then select High Availability as Role.
-
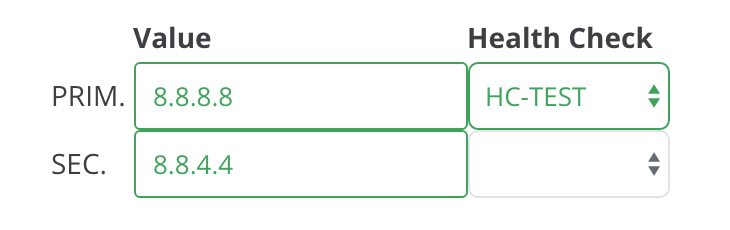
A new box will appear. In an HA record, you can define a primary and a secondary record, an associate an health check to the primary one.
-
It’s very simple: if the check confirms the host is alive, the DNS will answer with the primary record. When it fails, the secondary record is returned to clients.
-
You can define GEO records as well: those records will be returned based on client’s geographical proximity, and on the related health checks.
-
Finally, you can create Load Balancing records: this kind of record is similar to a weighted round-robin: clients will be returned random records from the set you define, based on the weight you specify and on the associated health checks.