
How to create and manage customers
- Log into the Enter Cloud Suite Admin Portal.
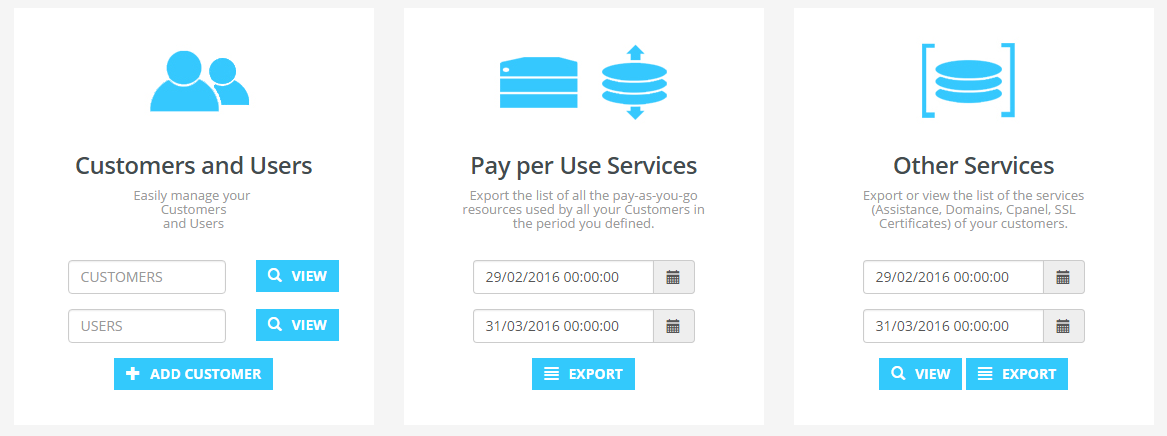
CREATE A CUSTOMER
-
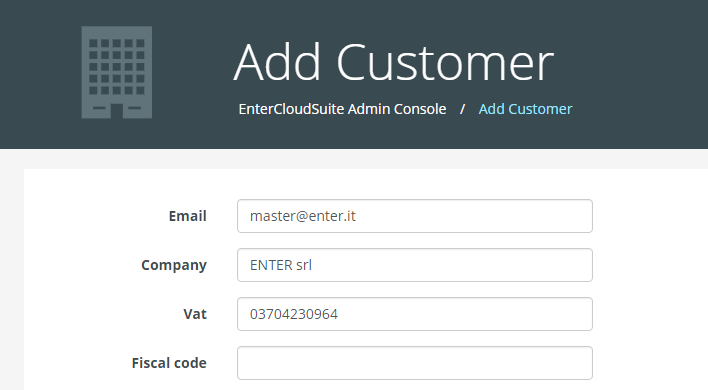
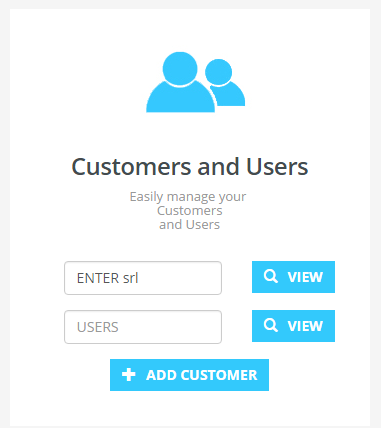
Click on Add customer button, in the left box
-
Insert the email address of the first customer user
- Insert company info:
- Name
- Vat
- Fiscal code
-
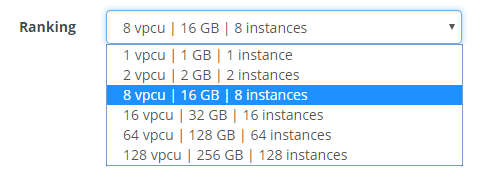
Define the ranking of the customer in order to assign resource quota
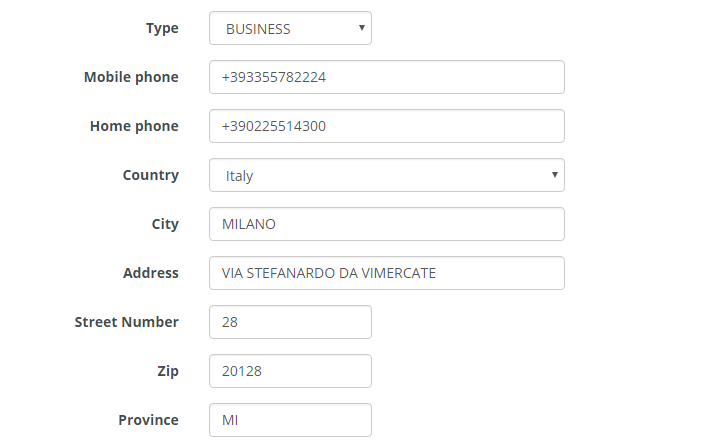
- Select the type of customer:
- BUSINESS - a company
- PRIVATE - a person
-
Select the customer Country and fill the anagraphic data
-
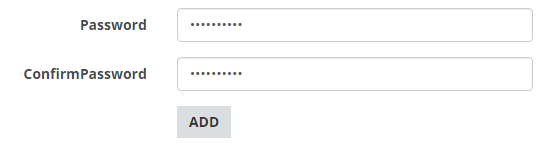
In Password and Confirm Password, type the password for the new user
- Click on Add to confirm the customer creation
SEARCH AND BROWSE CUSTOMERS
-
Go to the homepage of the Admin portal
-
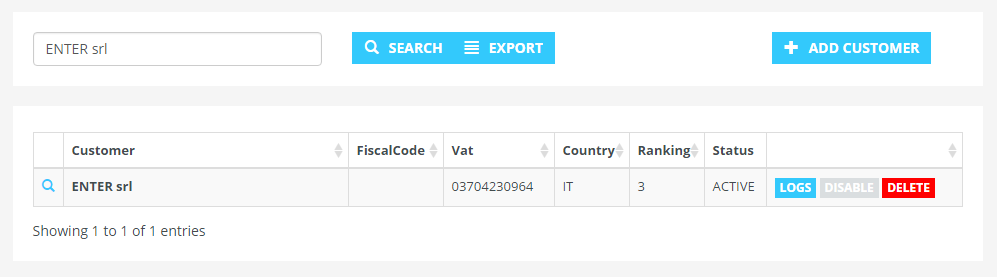
Insert the name of a customer in the field Customers, in the left box
-
Click on View button to search the customer
-
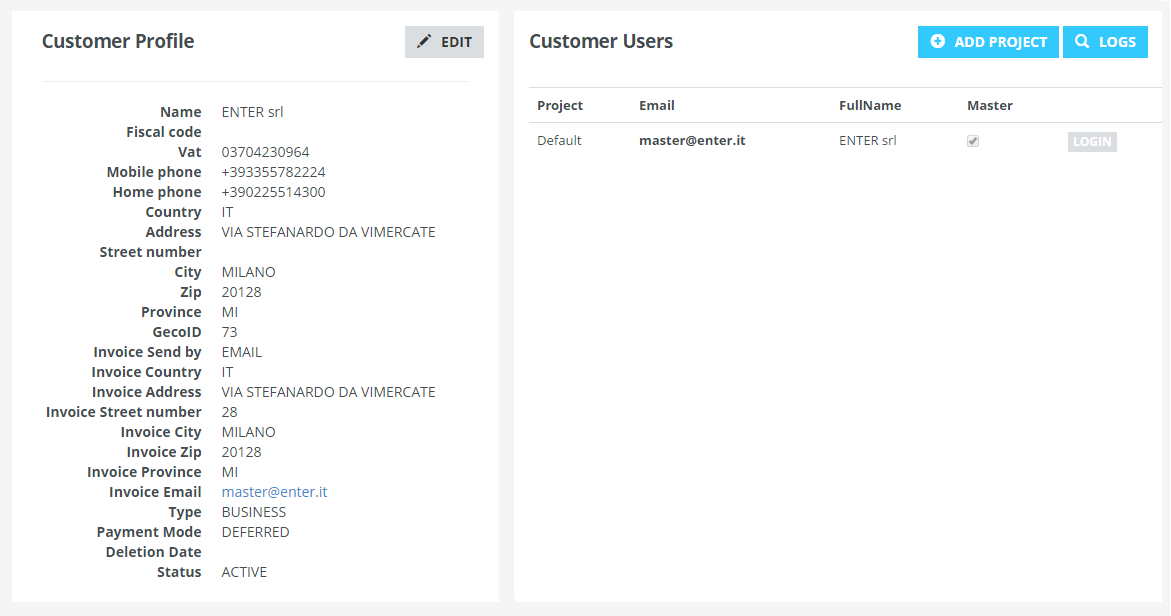
Click on the name of the customer to open the detail page
EDIT CUSTOMER INFO
-
Search a customer and open his detail page as seen in the previous steps
-
Click on the Edit button, in Customer Profile section
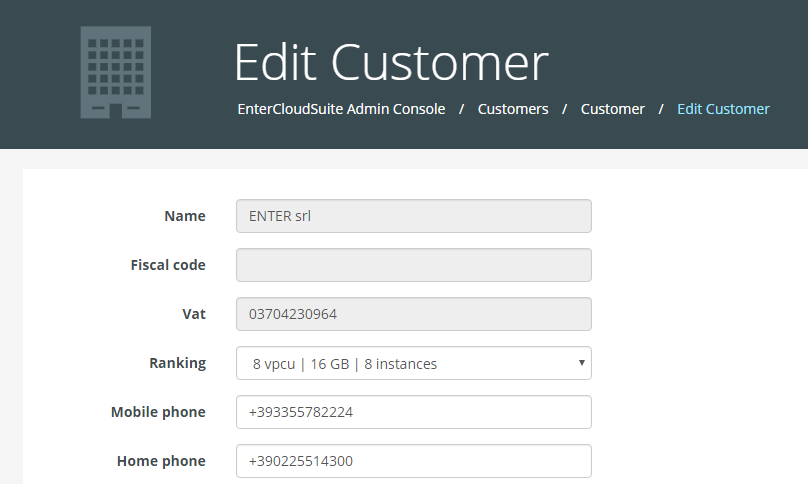
-
Change customer ranking or anagraphic data
-
Click on Save to confirm updates
DELETE A CUSTOMER
-
Search a customer as seen in the previous steps
-
In the customers list, click on the red Delete button
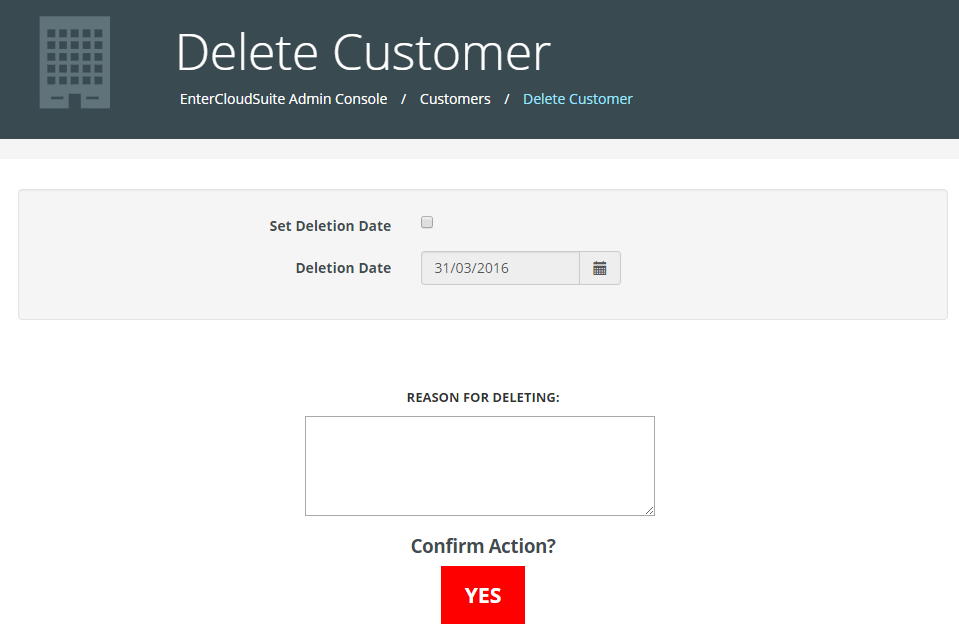
-
Define the deletion date. By default, the customer will be deleted immediately
-
Insert the reason for deleting the customer
-
Click on red “OK” button to confirm the deletion
CREATE A CUSTOMER PROJECT
-
Search a customer and open his detail page as seen in the previous steps
-
Click on the Add Project button, in the top right
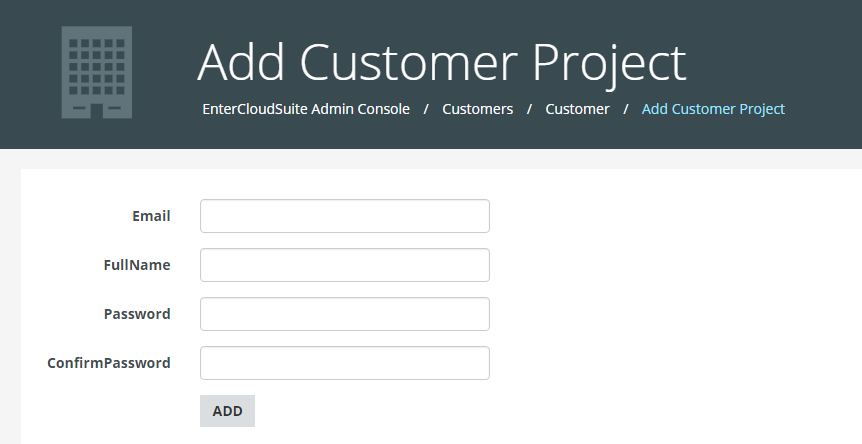
-
After the creation of the project a new user would be associated to it.
-
Insert the email of the user and the name for both, the user and the project
-
In Password and Confirm Password, type the password for the new user

-
Click on Add button to confirm the creation of the project